I accidentally permanently deleted important files from my SSD on a Windows 11 PC, and they weren’t in the Recycle Bin. I’m trying to figure out if there’s any real chance to recover deleted files from an SSD, especially with TRIM possibly involved. I need help finding safe recovery options because some of these files are really important and I can’t easily replace them.
I ran into this once on Windows 11, and yeah, the stomach-drop feeling is real. A file marked as permanently deleted is not always gone for good. If Windows has not reused those sectors yet, recovery still has a shot.
First thing I did, and what you should do too, was stop using the drive as much as possible. No app installs. No big downloads. No moving files around. Each write gives Windows another chance to overwrite the deleted data. On SSDs, this gets worse fast because TRIM might wipe the deleted blocks in the background. If your file was on an SSD, time matters more.
Before touching recovery tools, I would check the boring stuff first because it saves time when it works:
Quick places to check
- OneDrive
- File History
- Previous Versions
- Any cloud backup you forgot was running
- An old external drive
I have seen people spend an hour scanning a disk, then find the file sitting in OneDrive recycle or a backup folder they forgot existed. Start there.
If backups fail
When those checks come up empty, I would move to recovery software.
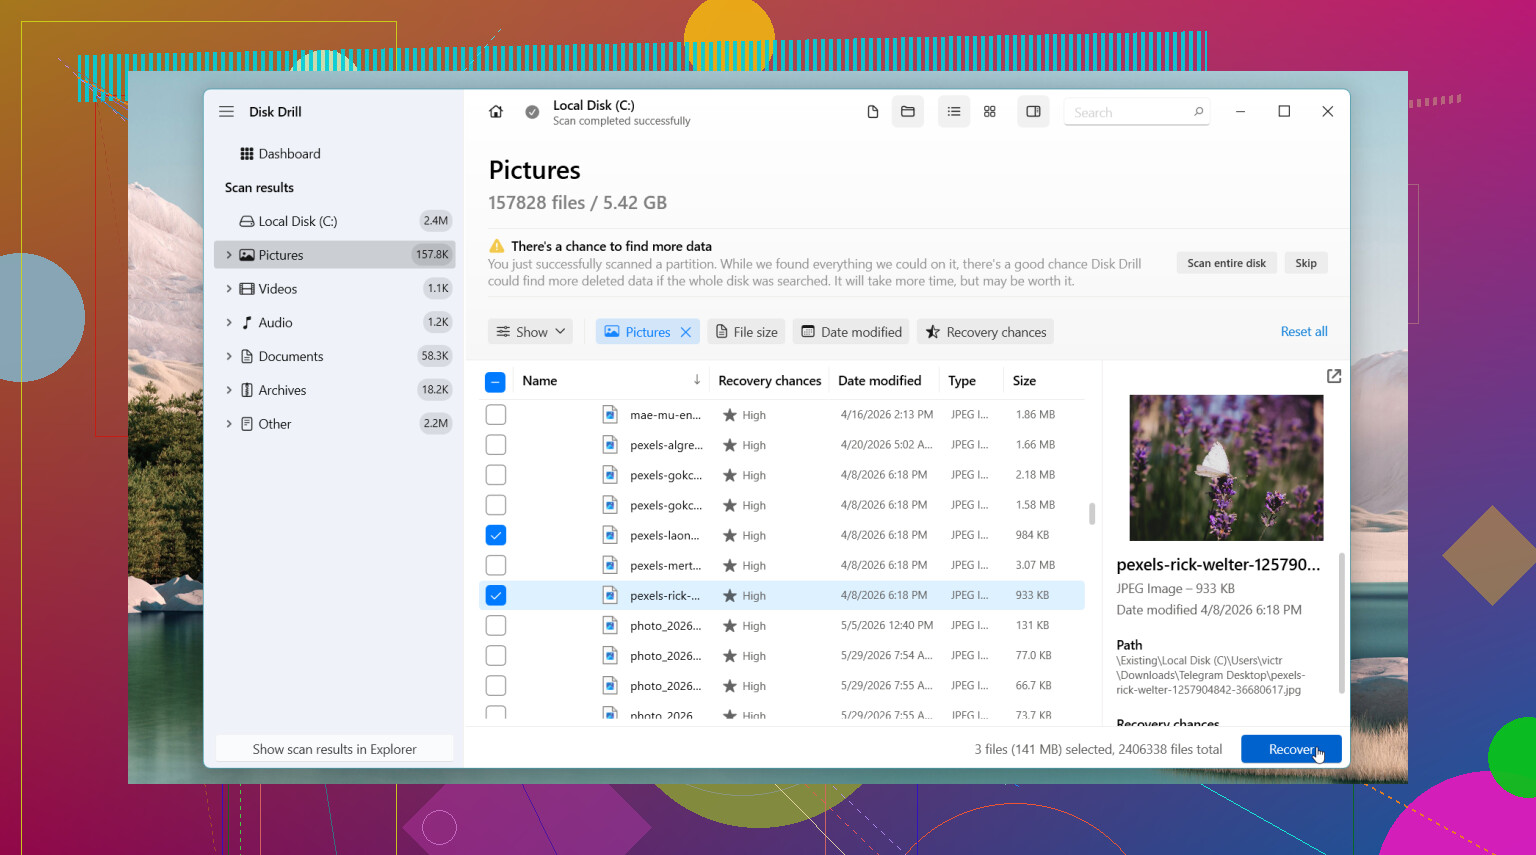
Disk Drill is usually the first one I would try. What stood out for me was how often it kept original file names and folder paths. That matters more than people think. Sorting through 4,000 files named file000123.jpg gets old fast.
Basic recovery flow
- Install Disk Drill on a different drive, if you have one.
- Scan the drive where the file was deleted.
- Go through the results and use search or filters to narrow it down.
- Preview the files you care about.
- Recover them to another drive, not back onto the same one.
On Windows, it lets you scan and preview without limits, and the free recovery cap is 100 MB.
Other tools worth a look
If the issue is bigger than a deleted file, I would look at other options.
DiskGenius
This one helped me more when the mess involved a lost partition, a RAW partition, or file system damage.
Windows File Recovery
Microsoft’s own tool. Free. No GUI, though. You type commands in the terminal, so it feels rough if you want point-and-click.
When I would stop and not DIY it
There are cases where I would not keep poking at the drive:
- It makes weird noises
- It drops offline at random
- Windows stops detecting it
- The data matters enough that failure is not acceptable
At that point, I’d lean toward a professional recovery service before doing more damage with repeated scans or random repair attempts.
The short version is simple. Use the drive less. Check backups first. If you scan, recover to a different drive. The sooner you do this, the better your odds usually are.

4 Likes
If the files were deleted from an SSD, your odds depend on TRIM. That’s the annoying part. On many Windows 11 systems, once TRIM runs, the deleted blocks get cleared fast. Sometimes in minutes, sometimes after a reboot, sometimes later. So I slightly disagree with @mikeappsreviewer on one point, a long scan is not always step one on SSDs. First, check whether the drive is still worth scanning at all.
Do this:
- Stop using the PC.
- Shut it down.
- If the lost files matter a lot, remove the SSD and connect it to another machine as a secondary drive, read-only if possible.
- Open Command Prompt and run:
fsutil behavior query DisableDeleteNotify
If it returns 0, TRIM is enabled. Recovery odds drop hard.
Another check:
winsat diskformal
or use CrystalDiskInfo to see SSD health. If SMART looks bad, don’t keep poking it.
If you want a fast route, Disk Drill is still one of the cleaner options for SSD file recovery on Windows 11, mostly because previewing and sorting results is less painfull than in many other tools. But if TRIM already cleared the blocks, no app will pull magic out of empty space.
One more place people miss is app-specific history:
Photoshop autosaves, Office temp files, Adobe cloud, browser downloads history, email attachments cache, Zoom or Teams export folders. I’ve seen ‘deleted’ docs still sitting there.
Also check this short guide for Windows 11 SSD file recovery steps:
see the Windows 11 SSD file recovery walkthrough
If the file is business, legal, or family stuff you cannot replace, stop DIY after one pass. SSD recovery gets worse fast.

One thing I’d add to what @mikeappsreviewer and @voyageurdubois said: if this was your system SSD, Windows 11 may have also removed traces from temp areas and app caches faster than people expect, so I would check application-level recovery before doing multiple deep scans.
Stuff I’d look at that gets missed a lot:
- Office Document Recovery pane
%AppData%and%LocalAppData%temp folders- Adobe autosave/recent files
- Notepad or editor session backups
- browser download folders/history
- email client attachment caches
Also, slight disagreement with the usual “scan it over and over with diff tools” advice. On SSDs that can just waste time, and sometimes stress a drive that already has bad NAND wear. One solid pass is smarter than ten desperate passes.
If you want to try software, Disk Drill is reasonable because it makes it easier to identify what’s actually recoverable instead of dumping a giant pile of junk at you. But if TRIM already cleaned the blocks, even the best Windows 11 SSD recovery software won’t do miracles. That’s the annoying truth.
Another underrated move: check whether the file existed in a different form. Search for:
- duplicate filenames
- older exports like PDF/JPG
- ZIP attachments
- synced copies inside messengers like Teams/Slack/Discord
And if you use Windows Search, try this in File Explorer:
content:keyword
Sometimes the file is still there and just got moved/renamed. Sounds dumb, but I’ve seen it happen. Twice lol.
If you want extra reading, this thread is pretty relevant: Windows 11 SSD file recovery discussion and deleted file tips
Short version: stop writing to the SSD, check app-level saves and synced copies, then try Disk Drill once, recover to another drive, and don’t expect magic if TRIM already fired.
I’d add one angle the others only hinted at: **check Volume Shadow Copy / Previous Versions from the parent folder**, not just File History globally. On some Windows 11 setups, a folder snapshot survives even when the file itself was hard-deleted. Right-click the folder where it lived, Properties, Previous Versions. It’s boring, but I’ve seen it save people a scan.
Small disagreement with the “remove SSD immediately” advice in every case: if it’s a modern laptop with BitLocker, weird OEM drivers, or no easy spare machine, physically pulling it can create new headaches. If the drive is stable, I’d first boot as little as possible and image it if you have the tools.
My order would be:
1. Check OneDrive web recycle bin and previous versions for that exact filename.
2. Check parent-folder Previous Versions.
3. If the data is valuable, make a sector image of the SSD first.
4. Scan the image, not the live SSD.
That last part matters more than people think. Recovery from an image is safer than hammering the original disk with multiple scans.
About **Disk Drill**:
**Pros**
- easy to sort by type, date, and path
- preview is actually useful
- less annoying than many recovery apps for finding one specific file
**Cons**
- if TRIM has already zeroed the blocks, it won’t help
- deep scans can return lots of renamed/raw files
- not the cheapest option if you need full recovery
So yeah, I agree with @voyageurdubois, @sonhadordobosque, and @mikeappsreviewer on stopping writes fast, but my main suggestion is: **image first if possible**. On SSD recovery, preserving the current state is sometimes the only real win left.