My USB drive suddenly changed from NTFS to RAW after I unplugged it, and now Windows says it needs to be formatted before I can use it. I have important files on it and want to know the least risky way to recover the data or convert the drive back to NTFS without making things worse. Looking for safe RAW to NTFS USB recovery advice.
I wouldn’t jump straight from RAW to NTFS if the drive has anything you care about. When Windows shows a drive as RAW, it usually means the file system structure is damaged badly enough that Windows stops treating it like a normal volume. So no, this isn’t like flipping FAT32 into NTFS with a quick conversion. The safer order is simple: get your files off first, then rebuild the drive.
This is the route I’d take.
First, stop writing to the drive
I’d avoid formatting it for now. I also wouldn’t run CHKDSK or start throwing DiskPart repair commands at it. Those tools write changes, and once you do that, recovery tends to get uglier. I’ve seen drives go from “recoverable enough” to “great, now half the folder tree is gone.” So leave it alone until your data is copied elsewhere.
Next, pull the files off
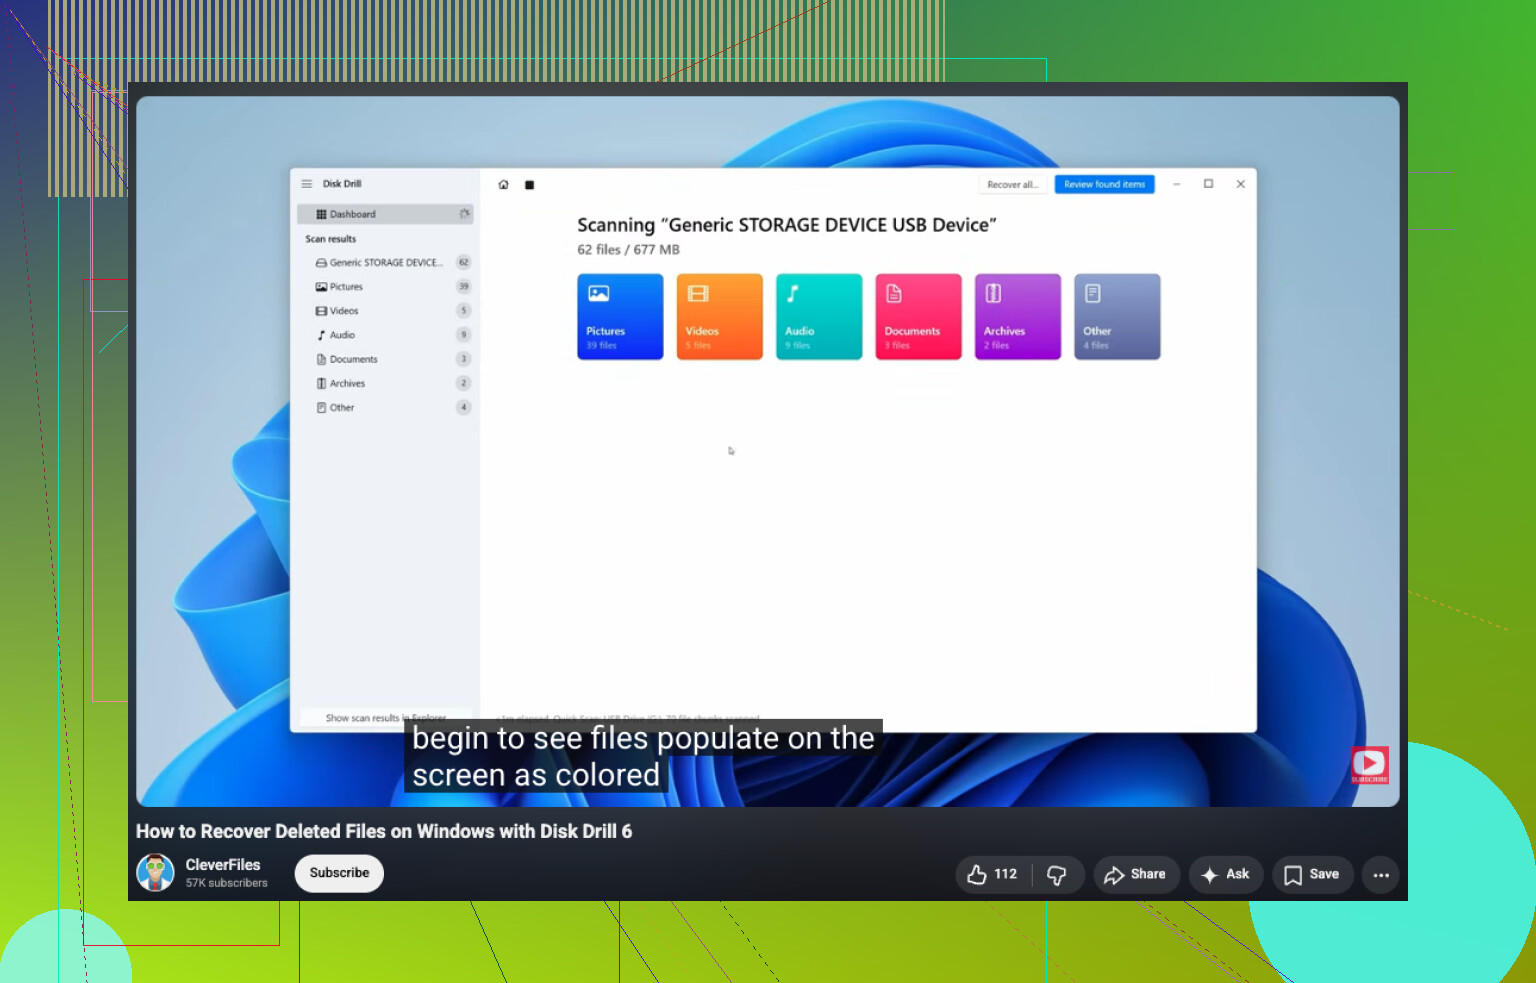
If the drive still shows up in Disk Management with the right size, I’d begin with Disk Drill.
The basic flow looks like this:
- Install Disk Drill onto a different disk, not the RAW one.
- Plug in the RAW USB drive, SSD, or external hard drive.
- Pick the RAW device and hit Search for Lost Data.
- Let the scan finish, even if it takes a while.
- Go through the results by folder, type, or filename.
- Preview the files you care about.
- Recover them to another storage device.
One thing I liked about Disk Drill on Windows is the free recovery limit of up to 100 MB. More useful than tht, scanning and previews aren’t capped, so you get a clear look at what’s recoverable before spending money.
The preview tool handles a long list of formats, docs, PDFs, photos, video files, audio, archives, and a pile of RAW photo types too. If a file opens properly in preview, I’d treat it as a decent sign the recovered copy will be usable.
It also helps with RAW volumes because it isn’t relying only on Windows being able to read NTFS normally. It looks for leftover NTFS metadata when any of it still exists, and if the structure is too far gone, it falls back to file signatures across hundreds of formats.
If the first scan misses stuff, I’d check the same drive with UFS Explorer or DiskGenius. Recovery tools don’t all pull the same results. I’ve had one tool miss an entire photo set while another found it with filenames intact. Annoying, but true.
After recovery, rebuild the file system
Once your important files are sitting somewhere safe, then I’d put the drive back into NTFS.
The easy way:
- Open Disk Management.
- Right-click the RAW partition.
- Select Format.
- Choose NTFS.
- Keep Quick Format checked.
- Press OK.
If Windows won’t offer Format, delete the RAW partition, make a new partition, and format the new one as NTFS.
One last thing. If this is an SSD, or a drive tht keeps dropping offline, throwing read errors, or slowing down more each time you touch it, I’d move fast on recovery. If it goes RAW again after you format it, I wouldn’t trust it with anything important. At tht point I’d replace the drive and move on.
12 Likes
Least risky means you do not try to turn RAW back into NTFS first. You treat it like a damaged file system and protect the data.
I agree with @mikeappsreviewer on one part, do not format yet. I slightly disagree on avoiding every repair option forever. If the files are low value, TestDisk is worth a read-only style attempt first, because it sometimes rebuilds the partition table or NTFS boot sector without file carving. But if the files matter, I would still image the USB before doing any repair.
My order:
- Check SMART or health if the USB enclosure supports it.
- Make a full image of the USB with HDD Raw Copy Tool or USB Image Tool.
- Work from the image, not the original drive.
- Try TestDisk on the image.
- If file system repair fails, use recovery software like Disk Drill on the image and export files to another disk.
- After your files are safe, wipe the USB, repartition, and format NTFS.
Why image first. Because flash drives get worse fast. One bad reconnect and your next scan sees fewer files. I learned this the annoyng way.
Also, if Windows reports 0 bytes, wrong size, or the drive disconnects during reads, stop DIY. That points more to hardware than file system damage.
For SEO-friendly help on Windows file recovery, this guide fits: watch this Windows deleted file recovery walkthrough
After recovery, do a full format to NTFS once, not quick. It checks for bad sectors. If errors return, toss the drive.
Least risky? Don’t try to “convert” RAW back to NTFS as step one. RAW is usually Windows saying “I can’t trust this filesystem anymore,” not some simple format switch.
I agree with @mikeappsreviewer and partly with @vrijheidsvogel, but I’d push one point harder: if the stick is physically flaky, repeated deep scans can be just as risky as repair attempts. Sometimes people keep rescanning until the drive is basicaly cooked. If the files are truly important, reduce power cycles and read attempts.
What I’d do differently:
- Try the USB in a different port and different PC first
- Check Disk Management to confirm the full capacity still appears
- If it does, make a sector image first if possible
- Then recover files from the image, not the live USB
If you want the simple software route, Disk Drill is fine for a RAW USB drive because it can scan past a busted NTFS structure and show recoverable files before you commit. Just recover to another disk, never back onto the same USB.
One more thing people skip: after recovery, test the flash drive with a full overwrite/read verification tool. A USB that suddenly flips RAW after one unplug often has controller or NAND issues, not just “bad luck.”
For people searching this stuff later, this is basically how to recover files from a corrupted USB drive on Windows.
After the data is safe, then format NTFS. If it goes RAW again, bin it.

I’d be a little stricter than @vrijheidsvogel, @sonhadordobosque, and @mikeappsreviewer on one point: if the files are genuinely important, skip all filesystem “fix” attempts on the original USB, including TestDisk at first. Repair tools are great right up until they write the wrong thing once.
Least risky path is this:
- stop using the USB immediately
- plug it in only long enough to check whether capacity looks normal in Disk Management
- if capacity is wrong, reads fail, or it disconnects, stop DIY and consider pro recovery
- if capacity looks normal, clone or image it first
- do recovery work only on the clone/image
- save recovered files to a different drive
- only after that, erase and reformat the USB to NTFS
Where I slightly disagree with the “full format after recovery” advice: for a questionable flash drive, a full format is fine as a test, but I would not trust the stick again just because the format succeeds. USB flash media can pass one day and fail the next.
About Disk Drill, since it keeps coming up:
Pros
- easy to use
- good preview support
- useful on RAW volumes
- decent for checking recoverability before committing
Cons
- free recovery limit on Windows is small
- deep scans can take a while
- results vary by damage type
- not always the best at preserving original folder structure compared with some competitors
So yes, Disk Drill is a reasonable recovery option, but use it on the image if you can, not the live failing USB. After your data is safe, reformat to NTFS. If it ever flips to RAW again, retire it.