I’m looking for an AI professional headshot app that can turn regular photos into clean, corporate-style headshots for LinkedIn and job applications. I’ve tried a couple of random tools I found through ads, but the results looked fake, over-edited, or didn’t match my actual face very well. I’d really appreciate suggestions for reliable apps or platforms you’ve personally used, what you liked or disliked about them, and any tips on getting the best results for professional use.
AI headshot apps I tried in 2026, what was worth it and what was meh
I got sick of booking studio sessions every time I changed jobs or updated LinkedIn, so I went on a small binge testing AI headshot apps. Below is what I used, what went wrong, and what I would use again if I had to send a photo to HR in 10 minutes.
All links are intact, nothing sponsored, just what happened on my phone and laptop.
Eltima AI Headshot Generator
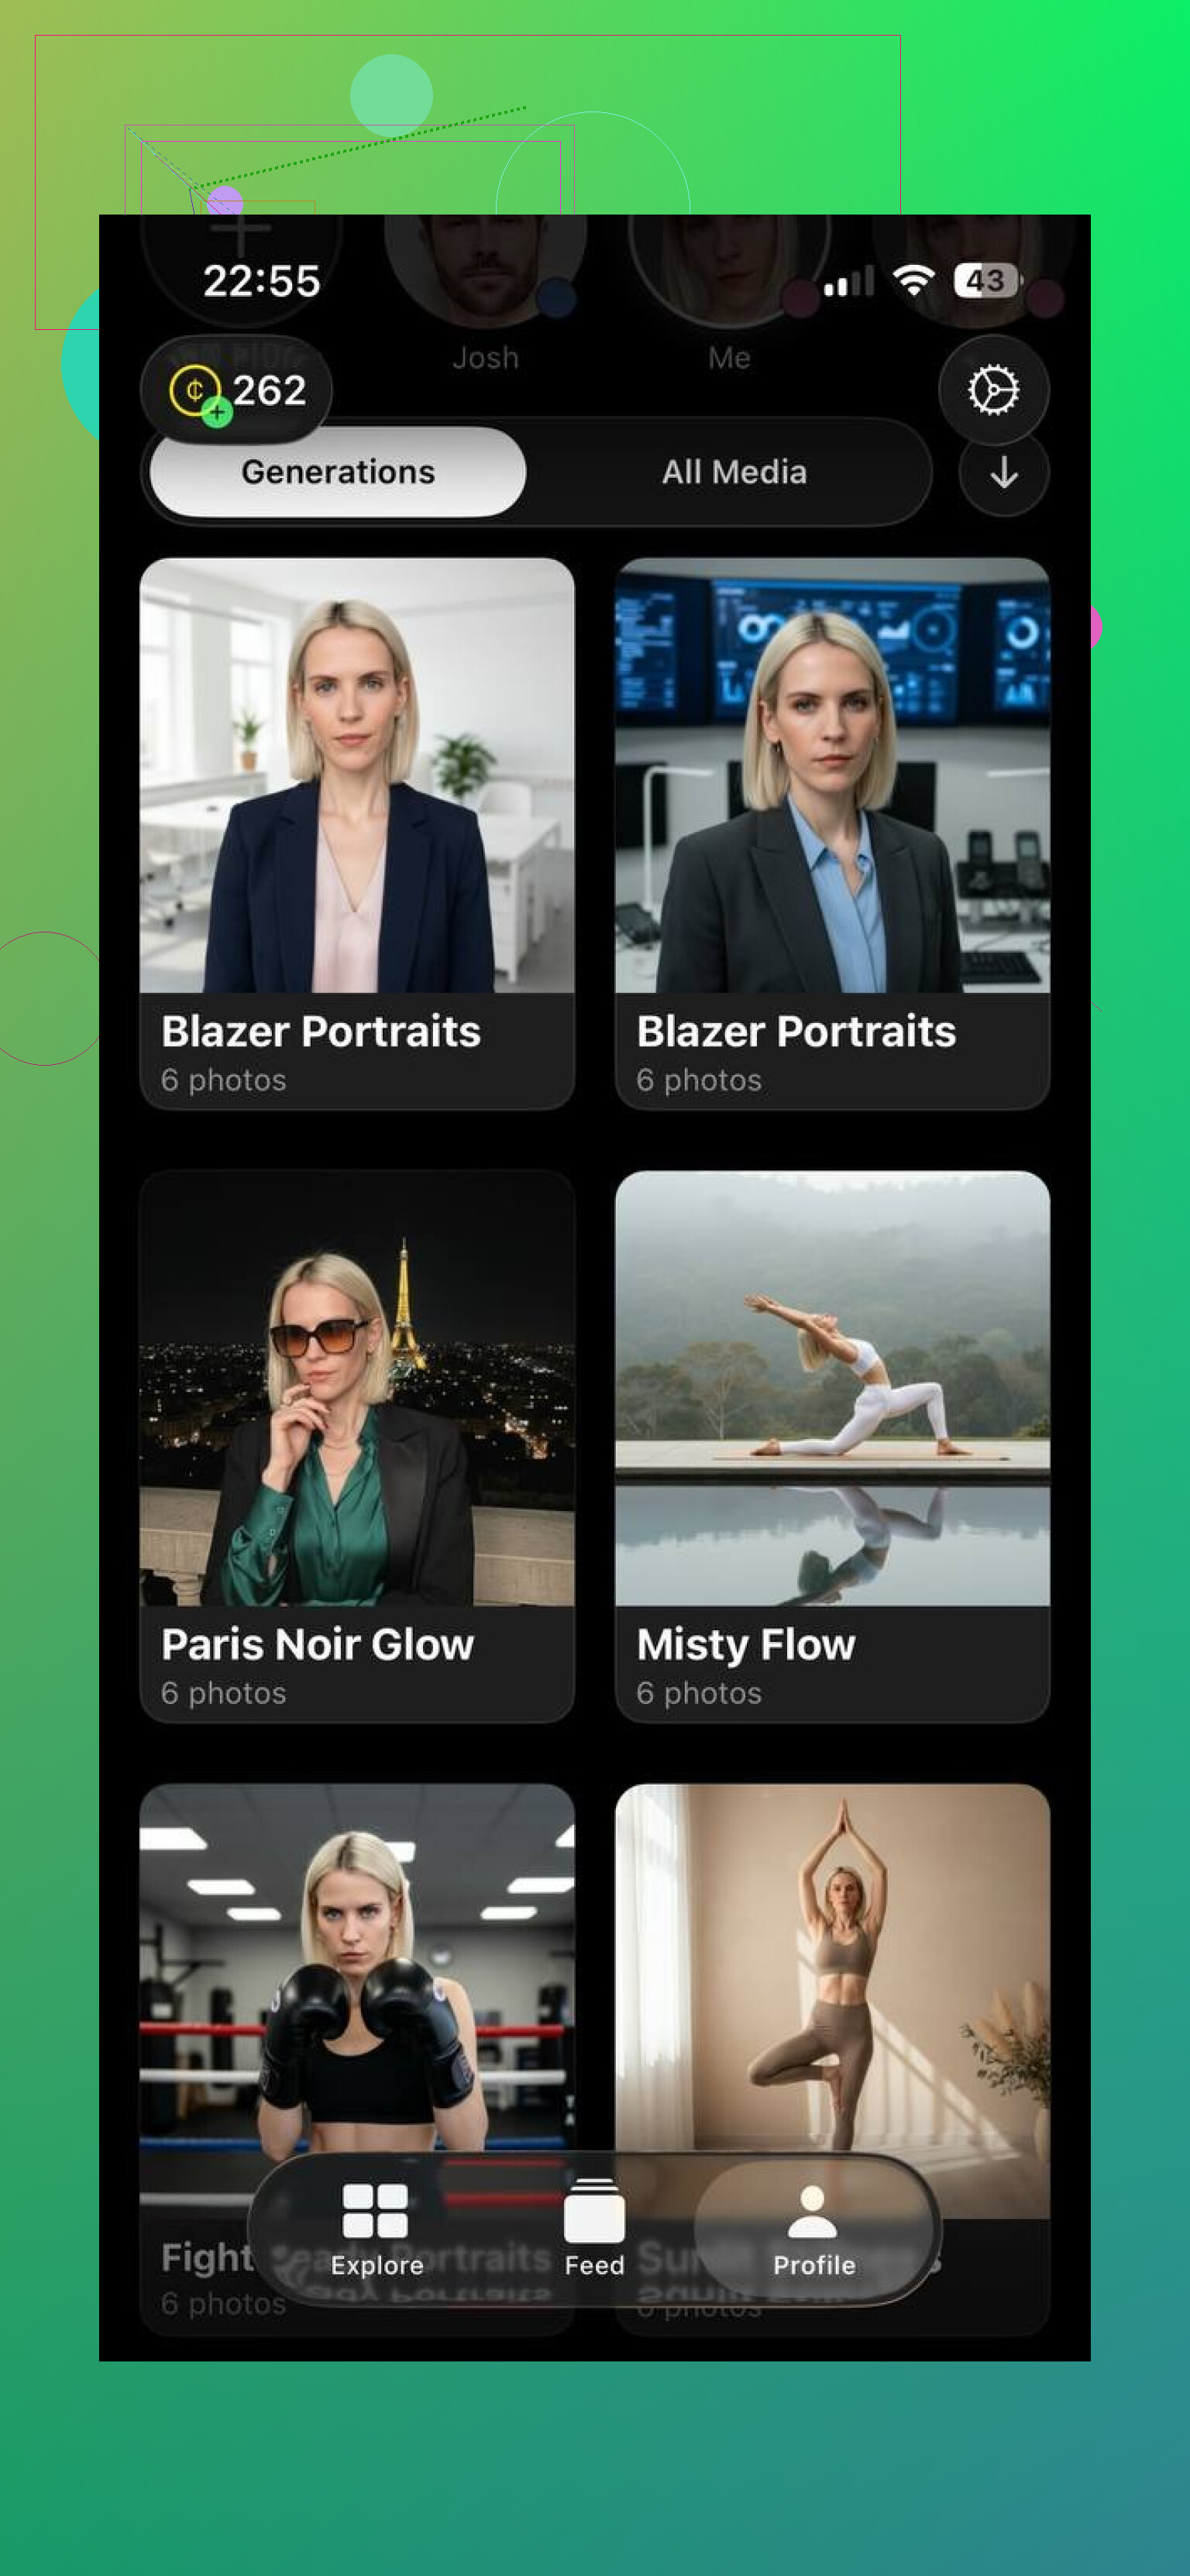
This one runs only on iPhone, no sign-up, no weird onboarding. I dumped in 3 selfies from my camera roll. Mixed lighting, some car selfies, one office shot. It still handled them.
What I noticed:
• Output looks like a studio session, not like a beauty filter
• Skin texture stays close to your real skin, so it does not turn into plastic
• Facial shape stays consistent across all generated photos
• Clothes and backgrounds look believable enough that no one in HR will raise an eyebrow
Workflow I used:
- Pick 1 to 3 selfies where your face is sharp and your eyes are visible
- Avoid sunglasses, hats, and wild shadows
- In the app, pick a style like “corporate”, “business casual”, or “outdoor”
- Wait a few minutes, then scroll through 50 to 100 results and screenshot or save the 5 best
Where it worked for me:
• LinkedIn and company intranet
• Speaking event page bio
• “About” photo for a small site
Where it struggled:
• If your source photos are blurry or heavily filtered, it tries to guess and the face can drift a bit
• Strong expressions in the input photos sometimes lead to subtle weirdness in teeth or eyes
If you want something fast that you can use for work without feeling fake, this was the most reliable one I tried.
More info on the dev page:
MoMo AI Portrait Maker
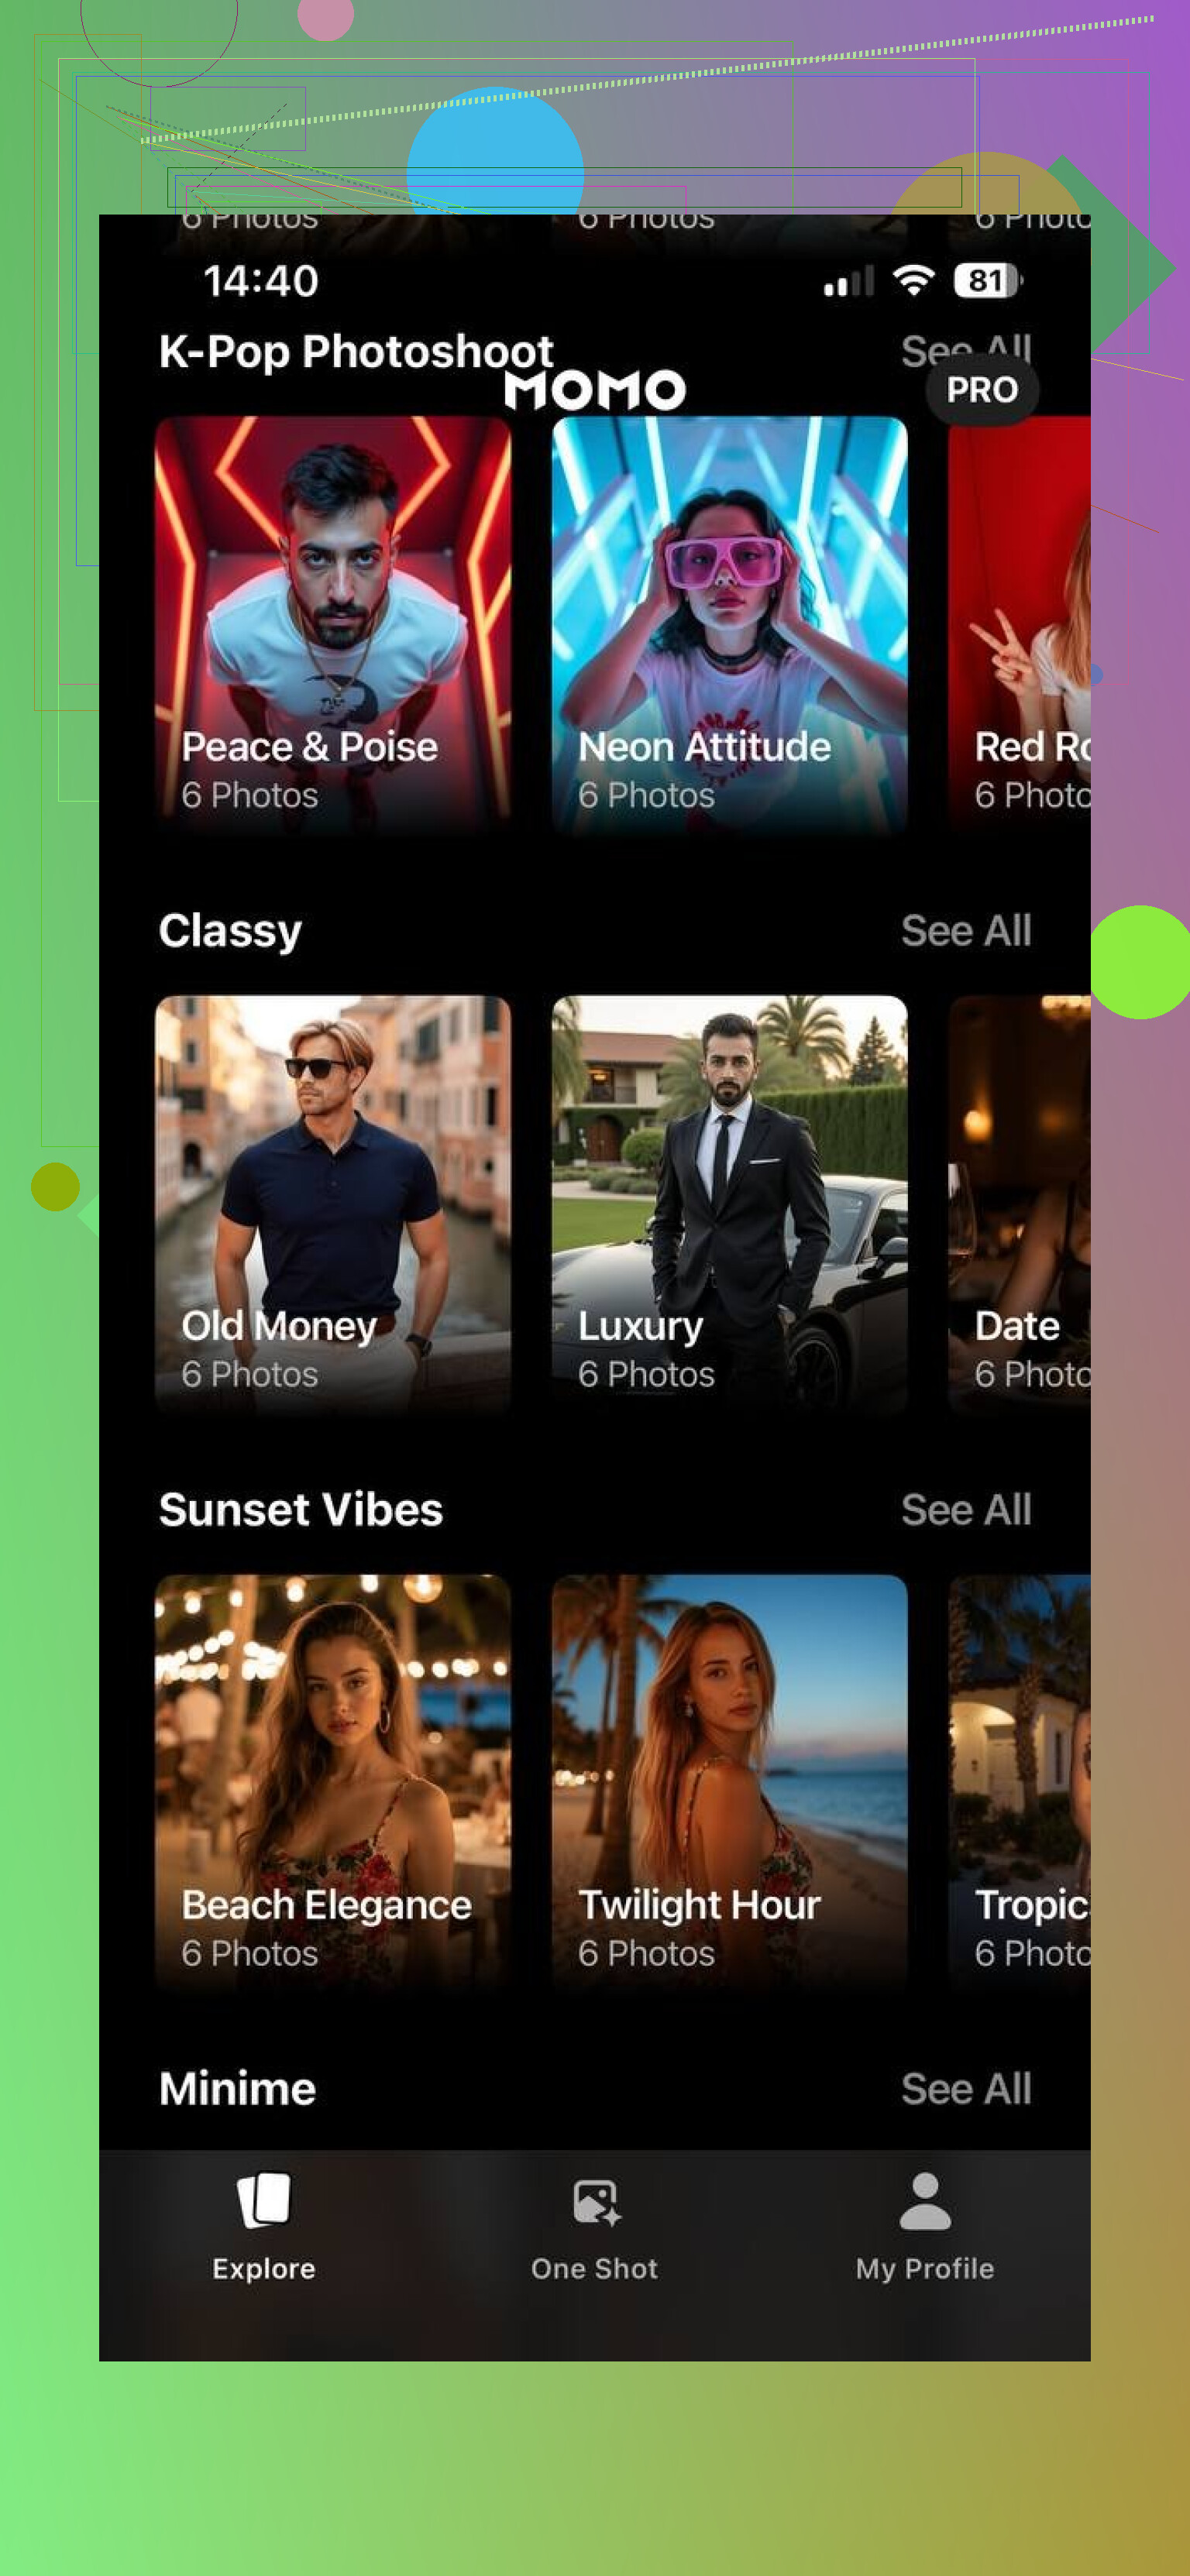
MoMo feels more like an Instagram toy than a strict “headshot” tool.
What it did well for me:
• Cool backgrounds, neon, film looks, “studio but trendy” stuff
• Portraits that look good on social profiles where you do not need to look like a CFO
• Strong colors and lighting that pop on mobile screens
How it behaves:
• It leans toward stylized, not neutral
• It likes to smooth skin and brighten eyes to the point where it stops looking like a photo and more like fan art
• It will happily change hair volume and sometimes hair color tone
Where it fits:
• Creatives, influencers, or anyone who wants to stand out more than blend in
• Personal IG, TikTok profile photos, Discord, dating apps
Where it did not work for me:
• Traditional corporate use
• Anything where the recruiter expects a simple, boring headshot
If your boss is old-school or your company is conservative, I would not send a MoMo portrait as a resume headshot. It looks good, but it looks “edited” from a mile away.
Gio AI Headshot Generator
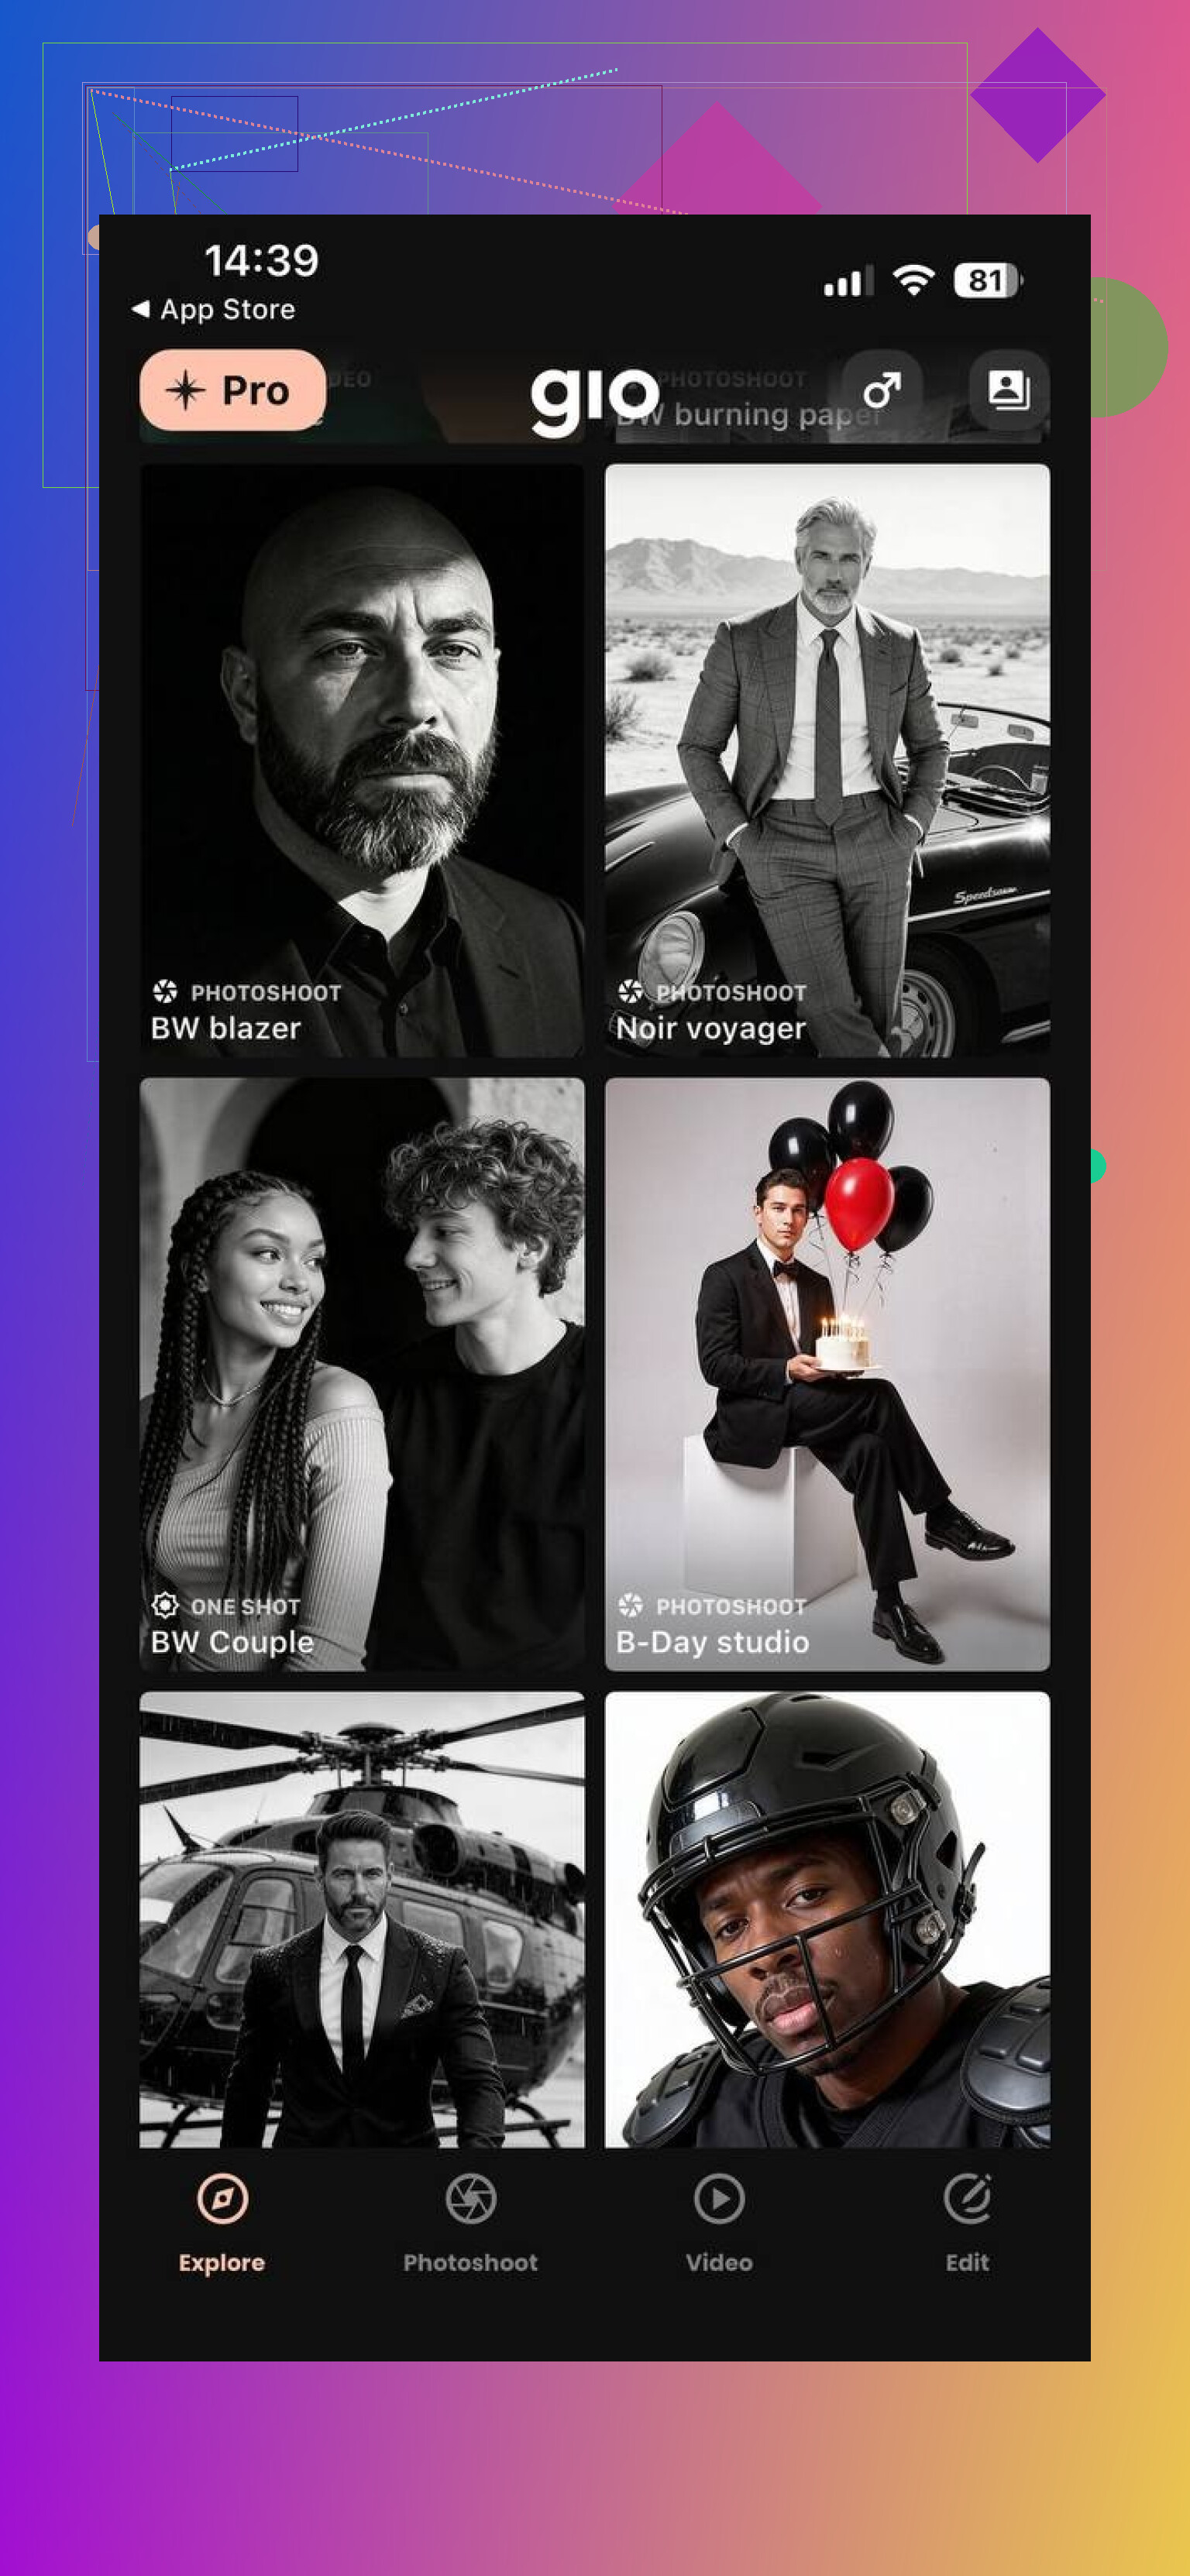
Gio runs on both web and mobile, which helped when I was testing from a laptop at work.
What I did:
• Uploaded 8 regular phone photos
• Chose a few background presets, like plain gray, blurred office, and soft gradient
• Let it generate a batch, then picked a few keepers
What I noticed:
• Workflow is simple, no complicated editing panel
• Styles sit in a middle ground, not super creative, not ultra formal
• You get a bunch of images that look similar enough to feel “on brand”
Quality notes:
• If the input lighting is good, the results look solid and usable
• If the source photos are dark or grainy, the model struggles more than Eltima
• It sometimes softens facial details more than I liked
Good use cases:
• Internal employee directories
• Slack and Teams avatars
• Quick upgrade from a random selfie to something a bit more “office”
If you need one clean headshot and do not care about fine-tuning, Gio does the job as long as you feed it decent photos.
Photoleap AI
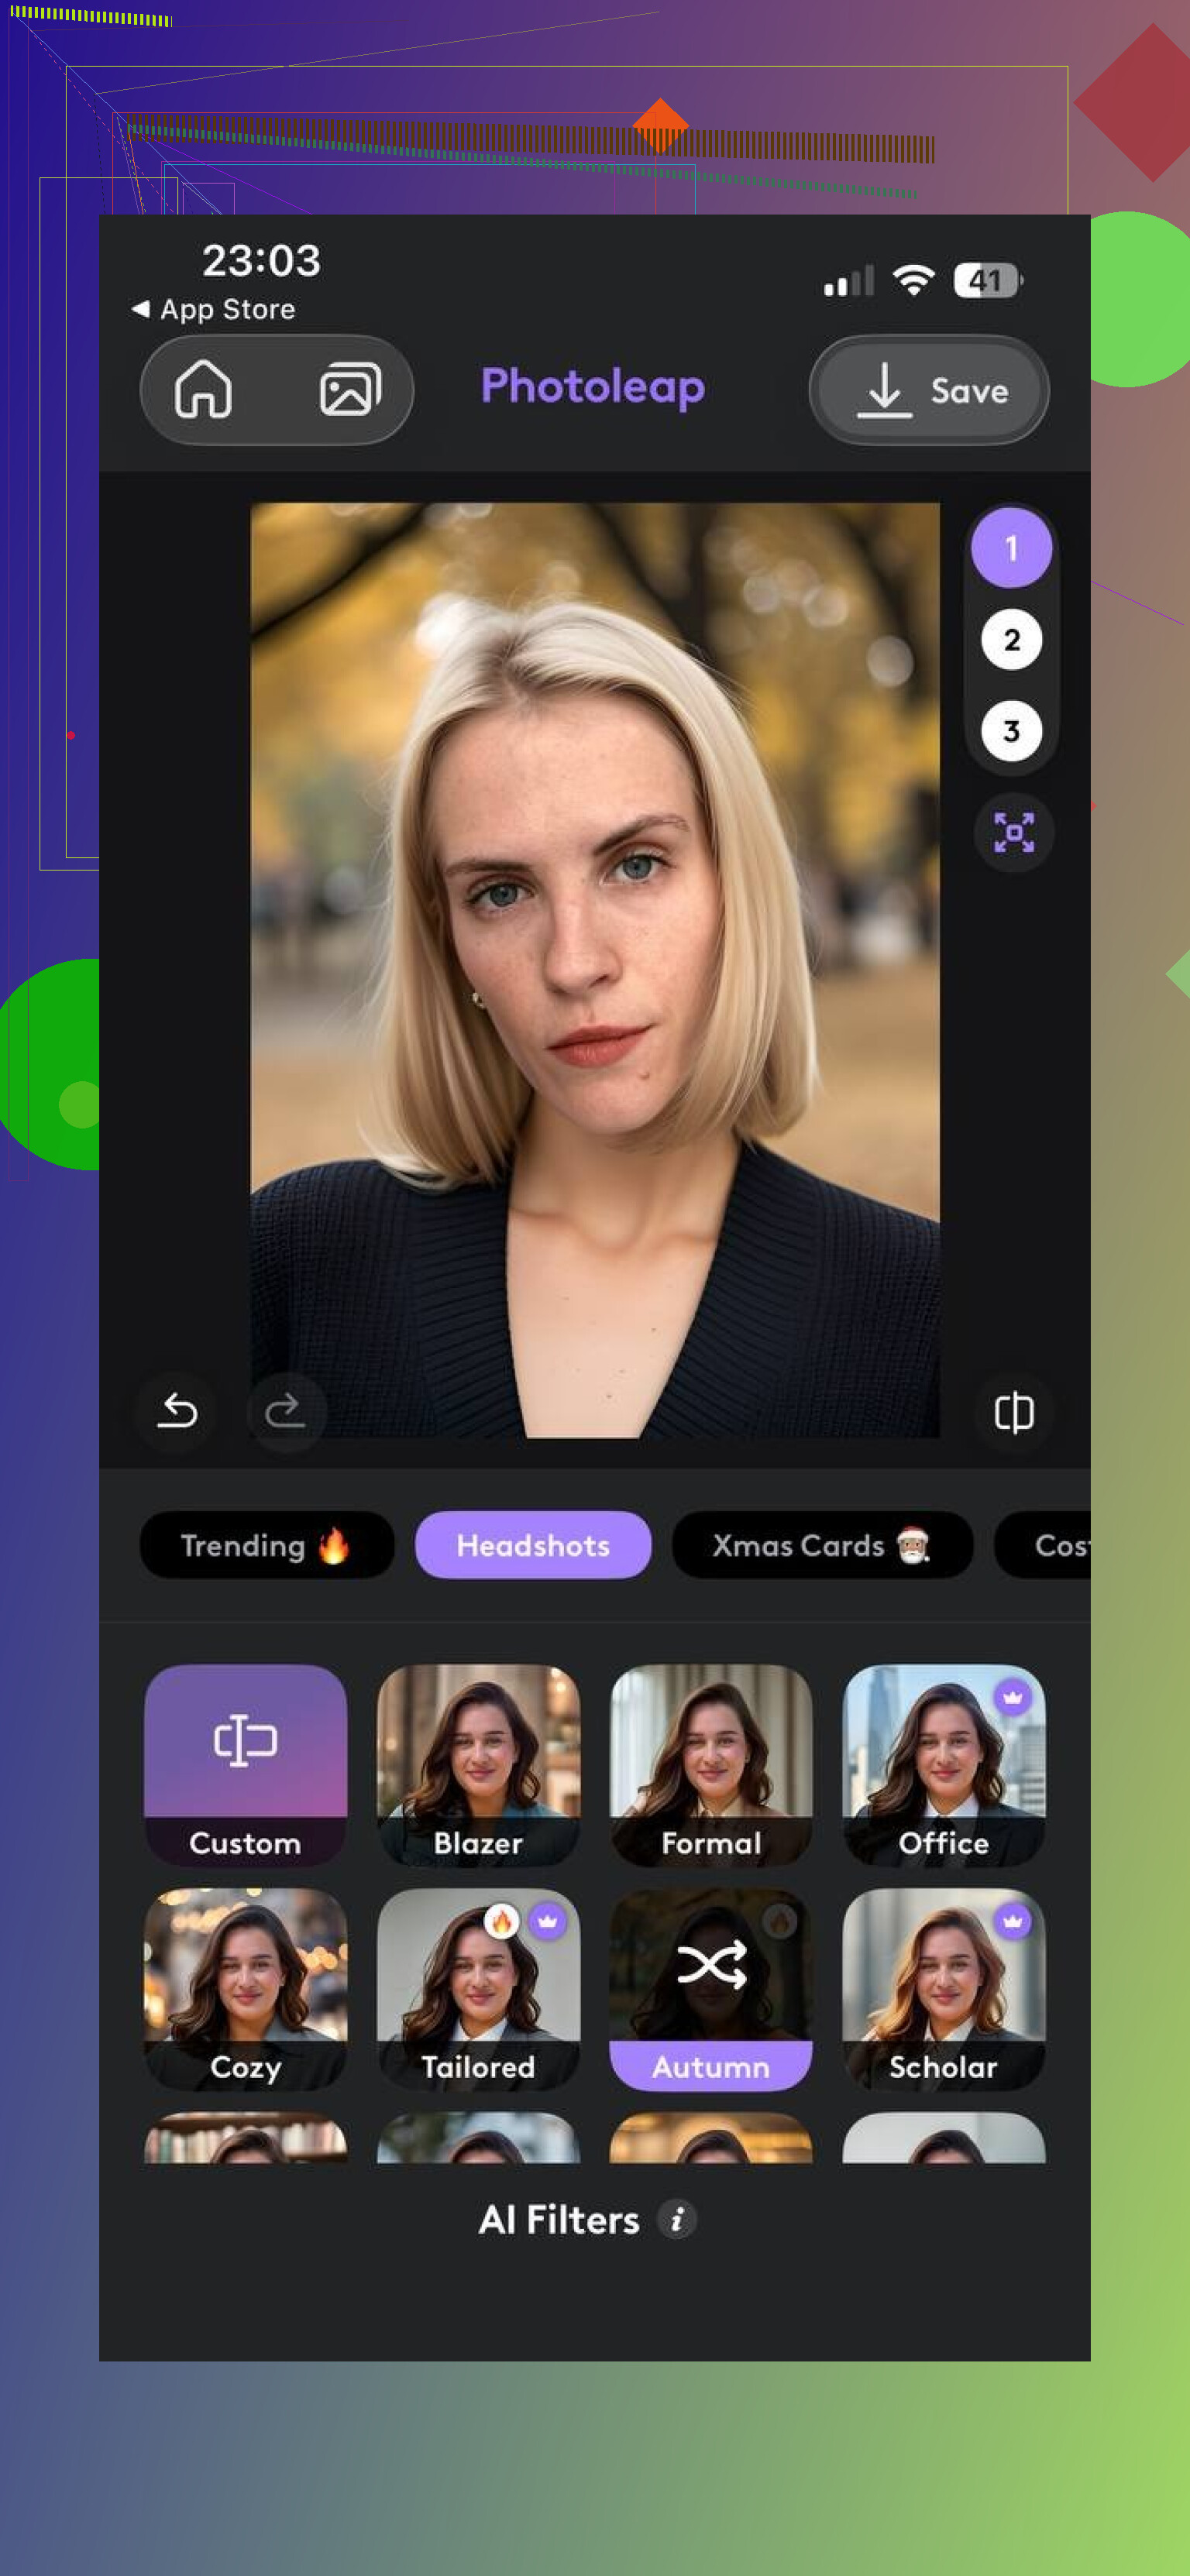
Photoleap is not a “headshot app” first. It is a full photo editor that also happens to have AI tools for portraits.
How I used it:
• Imported an AI headshot from another app that was close but not perfect
• Used Photoleap to tweak background blur, fix color, and adjust lighting
• Tried its AI portrait modes on a few raw selfies
Pros from my testing:
• You get layers, filters, and manual control over tiny details
• Good for cleaning up AI artifacts, like odd ears or uneven lighting
• Useful when you want one image polished until it looks intentional
Cons:
• More steps, more menus, more time
• Not beginner-friendly if you want a one-tap solution
• Easy to over-edit and end up with a photo that looks processed
Who it suits:
• People comfortable with editing apps who want to refine instead of accept the first AI output
• Designers or social media folks who like to tune every pixel
What I ended up doing a few times was: generate in Eltima AI Headshot Generator or Gio, then fix final touches in Photoleap. That combo gave me better control than trying to do everything in one place.
Why I keep going back to Eltima AI Headshot Generator for “serious” headshots
After messing with all of these, I started using each app for different things:
• MoMo when I want something loud and social
• Gio when I am on a browser and need simple, fast results
• Photoleap when I want to retouch or experiment
For anything where my name, resume, or a talk recording is attached, I ended up using Eltima AI Headshot Generator more than the others.
Reasons, based on my runs:
• It stays closest to how I look in real life
• The lighting and background feel like a real indoor shoot, not a filter
• Face shape and features stay consistent across multiple outputs
• No signup, all on phone, so the friction is low
If you need headshots for LinkedIn, CVs, corporate bios, or a personal website and you care more about looking real than “cool”, Eltima AI Headshot Generator has been the safest bet for me so far:
Practical tips no matter which app you try
From testing across these tools, a few things helped:
• Use 8 to 20 photos where your face is fully visible
• Avoid heavy makeup filters or AR effects in source photos
• Keep at least half of your inputs in neutral expression, no extreme smiles
• Include a mix of angles, but keep your head roughly upright
• Check ears, teeth, and eyes up close before sending any generated image to a recruiter
If you give the model clean input and do a 2 minute quality check at the end, most of these apps will output something usable. For me, Eltima AI Headshot Generator is the best headshot app because of natural look, ease of use, and professional vibe.
8 Likes
If the ad tools gave you weird doll faces, that tracks. A lot of them chase “wow” instead of “hireable”.
Since @mikeappsreviewer already covered the dedicated headshot apps, I will add some alternates and a slightly different approach.
- If you want pure corporate and low risk
Look at services that train on your face, not one-click filters.
Examples to look for in app store descriptions or sites:
• “Upload 10–20 photos, we train a model of your face”
• “Outputs 50–100 headshots in different outfits and backgrounds”
• “Emphasis on professional and business styles”
When you test one, check three things before paying or downloading full res:
• Nose and jaw stay the same across 5 different samples
• Eyes line up and pupils are even
• Teeth do not look like copy pasted blocks
If any of those look off in previews, move on. That weirdness stands out on LinkedIn.
- Use a two step workflow instead of trusting one app
This is where I disagree a bit with the single app approach from @mikeappsreviewer. One tap is fast, but you get locked into that model’s quirks.
Simpler and safer:
• Step 1: Use any decent AI headshot generator that offers “corporate” or “business” presets and multiple downloads. Pick the 1 or 2 shots where you look most like yourself.
• Step 2: Run the chosen image through a regular photo editor for small fixes only. Examples of edits that help:
– Slight exposure increase so your face is not murky
– Mild sharpening to keep eyes clear
– Subtle background blur or cleanup, nothing wild
Do not touch eye color, teeth color, or face shape. Recruiters notice when those look artificial.
- If you prefer web instead of mobile apps
Check for:
• Upload via browser
• “Professional headshot” or “LinkedIn photo” wording
• Option to choose neutral backgrounds like gray, off white, or simple office
Avoid tools that push:
• “Anime”, “cartoon”, “3D render”, “fantasy”, “cosplay”
These are tuned for fun portraits, not work photos.
- How to give the AI better input
You can salvage a lot by feeding it better images, even if the model is average.
When you pick your source photos:
• No sunglasses, no strong filters, no heavy blur
• Mix of 8–15 shots, different days, same person
• At least half with neutral or slight smile
• Avoid cropped foreheads, try to include the full head in most shots
• Try to include 1–2 photos in indoor light and 1–2 near a window
- Quick checklist before you use it on LinkedIn or a resume
Open the image on a laptop, not only on your phone. Then check:
• Do you recognize yourself instantly
• Any double ears or odd hairlines
• Any strange patterns in the eyes or teeth
• Clothes look like something you would actually wear to a job interview
If something feels off, you are usually right. Discard and pick another result instead of trying to edit it into shape.
If you want one simple strategy without chasing a specific brand:
• Find an AI headshot tool that advertises “professional” and lets you upload at least 8–10 photos.
• Generate a batch in a plain background and one business outfit.
• Pick the most natural one.
• Do light tweaks in any basic editor, then stop.
That gets you a clean LinkedIn photo that does not scream “AI experiment”.
Since @mikeappsreviewer and @nachtdromer already did a solid rundown on specific apps and workflows, I’ll tackle this from a slightly different angle: how to pick an app that won’t quietly sabotage your LinkedIn.
1. Decide what “corporate” actually means for you
Different industries tolerate different levels of “AI-ness.”
- Big 4 / finance / law / gov:
You want: neutral background, simple lighting, minimal retouching. The photo should look like an office photographer took it in 2017. - Tech / product / startups:
You can get away with softer backgrounds, a bit more color, and less formal outfits, but still obviously human and not over-edited.
Before picking an app, check its gallery / examples. If the front page is all neon, anime, and “3D avatar,” skip it for job stuff.
2. What to avoid in headshot apps (this is where a lot of ad tools fail)
Red flags in results:
- Teeth look like white blocks or copy-paste patterns
- Eyes have uneven pupils, overly sharpened irises, or glassy reflections
- Hairline or ears change between images
- Skin is totally textureless or blurred into wax
If an app regularly does any of that in its preview or examples, you’re wasting time. It will not magically behave better on your photos.
3. Where I slightly disagree with the others
Both @mikeappsreviewer and @nachtdromer lean hard into “train on 10–20 photos, get 50+ outputs” and then maybe refine in a second editor. That’s a great route, but:
- If you’re not super picky, a lightly tuned “LinkedIn / business” preset on a single-photo tool can be enough. Some newer tools do a decent job just enhancing one good selfie into a cleaner, more polished headshot without full model training.
- You don’t have to do a two-step workflow if you’re just trying to not look like you crawled out of a Zoom call at 2am. One decent app with a neutral preset can be plenty.
The catch: for those one-photo enhancers, make sure they:
- Keep your face shape identical
- Don’t resize your eyes or reshape your nose
- Mostly work on background, exposure, and mild retouching
If you see “change outfit to tux / lab coat / police uniform” front and center, that’s costume cosplay, not a serious headshot tool.
4. How to quickly test any new app without wasting money
Two fast tests before you pay or commit:
-
Consistency test
- If the app uses 10–20 training photos:
Generate 5–10 “corporate” shots. Open them side by side.
Ask yourself: if someone saw these, would they all clearly be the same person on the same day, or do you look like cousins of yourself? - If they look like different people, that’s a no.
- If the app uses 10–20 training photos:
-
Reality test
Zoom way in on:- Eyes (check for weird reflections / double pupils)
- Teeth (no melted toothpaste blob)
- Ears (no duplication / morphing into hair)
If you see any obvious artifact on a first try, assume it will pop out even more once uploaded to LinkedIn and viewed on a large monitor.
5. Practical approach that avoids overthinking it
If I were in your exact spot, had some normal selfies, and wanted something clean and corporate without overcomplicating it, I’d do:
-
Grab any AI headshot app that explicitly advertises:
- “Professional headshot”
- “LinkedIn / resume / corporate”
and shows boring sample images with gray or office-like backgrounds. If it looks dull, that is actually good here.
-
Feed it:
- 8–15 selfies, all with visible eyes, no sunglasses, no heavy filters
- Mostly neutral faces, one or two light smiles
- Try to avoid anything super grainy or dark
-
Generate one or two styles:
- Plain background (light gray or off-white)
- Business outfit roughly matching what you’d wear to an interview in your field
-
From the batch, pick one that:
- Looks most like you right now (age, weight, hair)
- Has normal skin texture
- Has subtle expression (not huge grin, not mugshot)
-
If needed, touch up only:
- Slight brightness / contrast
- Maybe tiny crop and straightening
Don’t mess with face shape, eye color, or teeth whitening. That is where things start to look uncanny.
6. Last gut-check before you upload
Open the final photo on a laptop and ask yourself:
- If I walked into an interview today, would the person think “yep, that’s them”?
- Would I be slightly embarrassed if someone asked “is that an AI pic?”
If the answer to both is comfortable, you’re done. If something feels off and you can’t name what, toss it. With these tools, “weird but I can’t say why” usually means there’s an artifact your brain caught but your words didn’t.
So the short version:
Pick a boring-looking “professional headshot / LinkedIn” app, ignore the flashy ad tools, give it clean input, and aim for natural over perfect. The tools that try to make you look like a Marvel poster are exactly the ones ruining those early attempts you already had.