I need to reduce an iPhone photo’s file size for uploading, but every compression method I’ve tried makes the image look blurry. What’s the best way to compress an iPhone photo while keeping the original quality and sharpness?
Photo compression is just a way to make an image file smaller. In most cases, that means doing one of two things:
- Reducing quality: Lossy compression removes some image data. At a moderate setting, the difference is usually hard to notice. Push it too far and you’ll see blur, compression artifacts, and missing detail.
- Resizing the image: A 4032 × 3024 photo can be reduced to something like 2048 × 1536. Fewer pixels means a much smaller file. This often makes more sense for email and website uploads since the full resolution usually isn’t displayed anyway.
You generally don’t need the smallest possible file. Light compression can cut the size by 50% or more while leaving the photo looking almost identical.
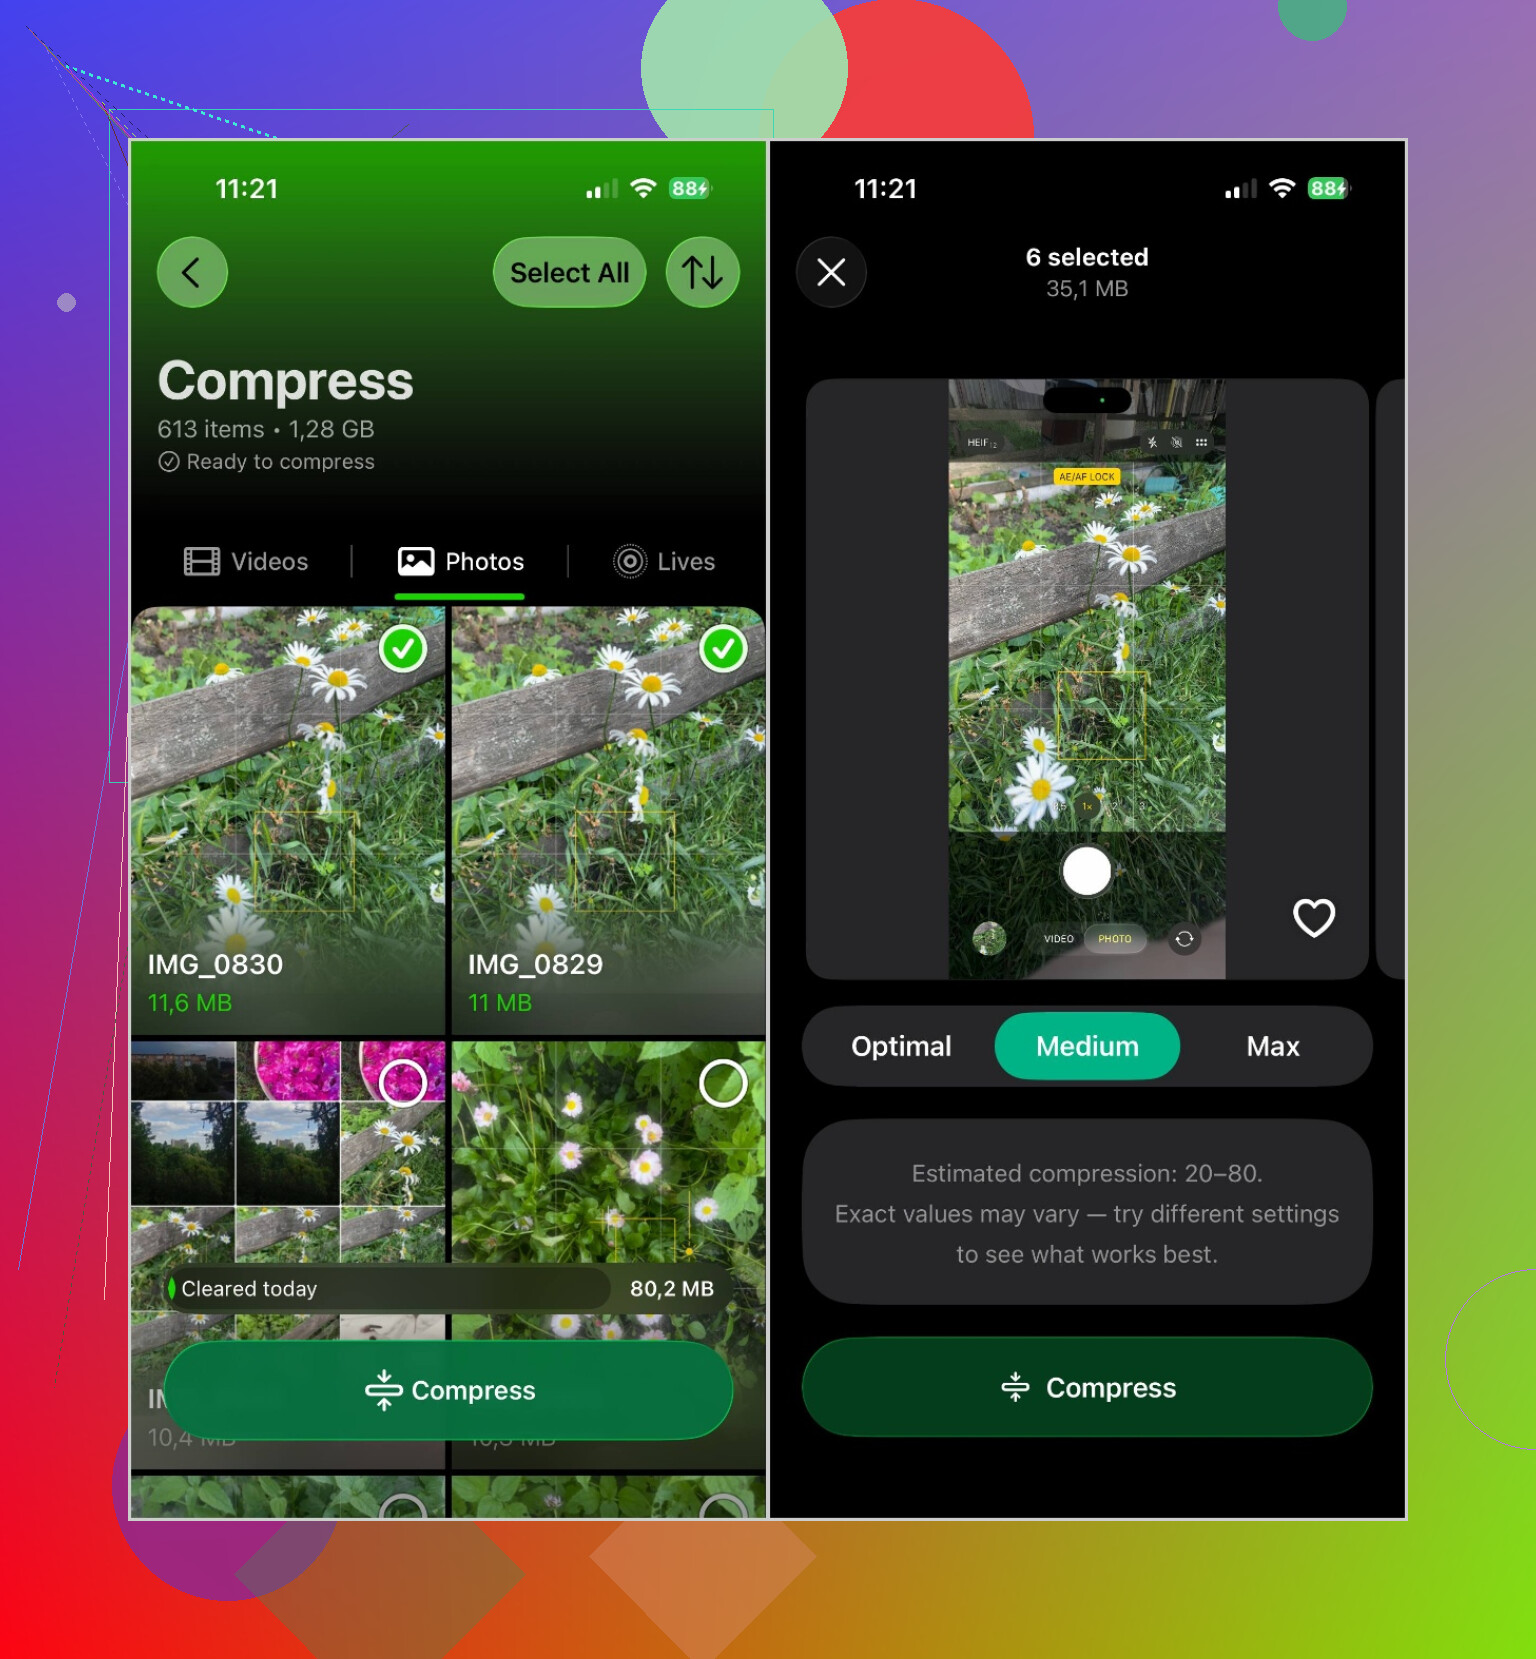
For one or two images, the built-in iPhone options are probably enough. If you have a large batch to deal with, I’ve had good luck with Clever Cleaner. It can process multiple photos instead of making you handle each one separately.
After installing the app, give it access to your photo library and open the Compress section. Select the photos, choose a compression level, and check the estimated storage savings. You can then save the compressed versions. If you’re trying to free up space, confirm that the new copies look okay before deleting the originals.
The useful part is seeing the estimated savings before anything changes. That makes it easier to judge whether the smaller file is worth the quality loss.
It also has a few storage-cleanup tools beyond compression. It can find duplicate photos, group similar shots, identify large videos, organize screenshots, and convert Live Photos into regular still images when you don’t need the motion.
So for a quick upload, stick with the iPhone’s built-in tools. For compressing a lot of photos while cleaning up storage at the same time, a dedicated app is much less tedious.
18 Likes
Don’t compress the same copy over and over, and don’t use a screenshot as the “smaller” version. Both methods throw away detail quickly and can make text, hair, and fine edges look soft.
@turbofox is right that resizing is usually the cleaner fix. Make one copy, crop anything you do not need, then reduce its dimensions to roughly what the upload site will display. Export that copy once as HEIC if the site accepts it, or as JPEG at a fairly high quality setting if it does not. Repeated JPEG saves cause more visible damage than a single resize and export.
Keep the original in Photos until the upload succeeds. If the file limit is unusually strict, you cannot preserve literal original quality, but reducing pixel dimensions usually looks better than dragging a compression slider down until the full-resolution image fits.

Check the uploaded file before blaming the compression.
A lot of sites generate a soft-looking preview, especially on mobile, then show a sharper version when you open the image at full size. Some services recompress every upload anyway, so feeding them a huge HEIC file can actually produce worse results than uploading a properly sized JPEG yourself.
@dimathesocket is right about exporting only once. I’d use the built-in Shortcuts app and make a simple shortcut with “Resize Image” followed by “Convert Image.” Set the longest side to around 2000 to 2500 pixels, convert to JPEG, and keep the quality fairly high. That is normally plenty for a website while avoiding the mushy look caused by forcing a full 12-megapixel image under a tiny file limit.
Pay attention to what the photo contains. Faces and ordinary scenery tolerate JPEG compression well. Small text, diagrams, screenshots, and thin lines do not. If those details matter and the upload form accepts PNG, PNG may look cleaner, though the file can be larger.
Clever Cleaner makes more sense when you have a whole batch. For a single upload, adding another app is probably unnecessary. Whatever method you use, zoom to 100 percent on the saved copy rather than judging it while pinching in Photos. If it looks sharp locally but blurry after upload, the website is doing the damage, not your iPhone.
A photo uploaded directly from Photos and the same photo pulled back out of Messages or WhatsApp may have very different quality before you even touch a compression setting. Messaging and social apps often create smaller copies, so start with the original in Photos rather than an image that has already been passed around.
Work backward from the upload limit. If the site allows a few megabytes, keep the original dimensions and convert from HEIC to a high-quality JPEG only if HEIC is rejected. For a strict limit, reduce the longest side first, then lower JPEG quality only as much as needed. Save the result to Files and upload that exact copy so there is no confusion about which version you selected.
No app can make a file dramatically smaller while preserving literal original quality. Clever Cleaner may save time for a batch, but for a single photo, one controlled export is simpler and avoids another unnecessary copy.
If the photo already went through an edit in Photos before you export it, you’re stacking two rounds of processing, and that alone can soften edges before compression ever touches it. Duplicate the untouched original first, then resize. The 2000ish longest side that @binarylynx_10 mentioned is solid, just make sure you’re starting from a clean copy.